The Aqara Presence Sensor FP2 is an exciting addition to my smart home setup, offering next-level motion detection using mmWave technology. Unlike traditional motion sensors, it can precisely detect where a person is in a room, perfect for advanced automation.
At this point I already have the Aqara M3 hub powered via PoE (Power over Ethernet), primarily for integrating my Aqara devices into Apple HomeKit.
Table of contents
Powering the FP2 Presence Sensor
Presence sensors are typically powered via a mains connection. If anyone knows of a battery-powered option, please share a link in the comments. The need for a power source may present a placement challenge (and require an extra plug), but it does eliminates the hassle of replacing batteries every year.
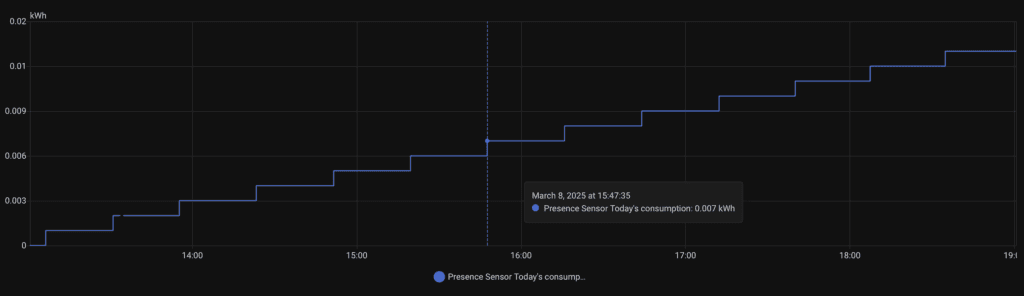
The good news is (following a rough Home Assistant) calculation it consumes 0.013 kWh per hour so over 3 days to use a kWh.
Setting Up the Aqara Presence Sensor FP2
The Aqara Presence Sensor FP2 comes with a USB to USB-C power cable and a mounting bracket, but you’ll need to provide your own country-specific power plug. Place the sensor in your desired location for optimal coverage—either on a wall or ceiling.
I opted to set mine on a shelf because I couldn’t find a subtle location to wall-mount it.
Step 1: Add the Aqara Presence Sensor to Aqara Home
- Install the Aqara Home app from the App Store (iOS) or Google Play (Android). If you don’t already have an Aqara account, create one.
- Power up the Aqara FP2 sensor using a USB-C cable.
- Open the Aqara Home App and tap “+” to add a device.
- Select “Presence Sensor FP2.”
- Scan the QR code on the back of the FP2 to connect it to Wi-Fi (2.4GHz only).
- Wait for the sensor to complete pairing. This may take two to three minutes.
Error 2016 : Click for Solution
When adding my second FP2 to the platform, I encountered a cycle of yellow flashing lights, blue flashing lights, and then back to yellow. Eventually, my device displayed Error 2016.
After several attempts to connect, I discovered that the blue flashing light indicates the device is attempting to connect to Wi-Fi. If the connection is successful, the blue flashes slow down, and the device is added.
To resolve this, I rebooted my IoT Wi-Fi network, and the FP2 connected on the first attempt.
Step 2: Integrate with a Smart Home Platform
The Aqara FP2 is compatible with:
- Apple Home (HomeKit)
- Amazon Alexa
- Google Home
- Home Assistant (via Matter or Aqara integration)
You don’t have to add your Aqara devices to a smart home platform; the Aqara app itself offers a great dashboard and automation features.
To add it to Apple HomeKit, scan the HomeKit QR code in the Aqara app. This is part of the setup process when adding the sensor to the Aqara app.
For Home Assistant, you may need to use a custom MQTT setup or the Matter integration. The Aqara Presence Sensor currently supports a single Matter controller at any time. If you want to add it to Home Assistant, you must first remove it from HomeKit. Fortunately, this is straightforward, Home Assistant detected the sensor automatically and prompted me to add it.
If you encounter issues, reset the device by holding the side button for 10 seconds until the LED blinks rapidly. I had to reset my sensor because I took too long to add it to the Aqara app after powering it on.
Step 3: Configure Detection Zones & Settings
- Once added, go to the sensor settings in the Aqara Home app.
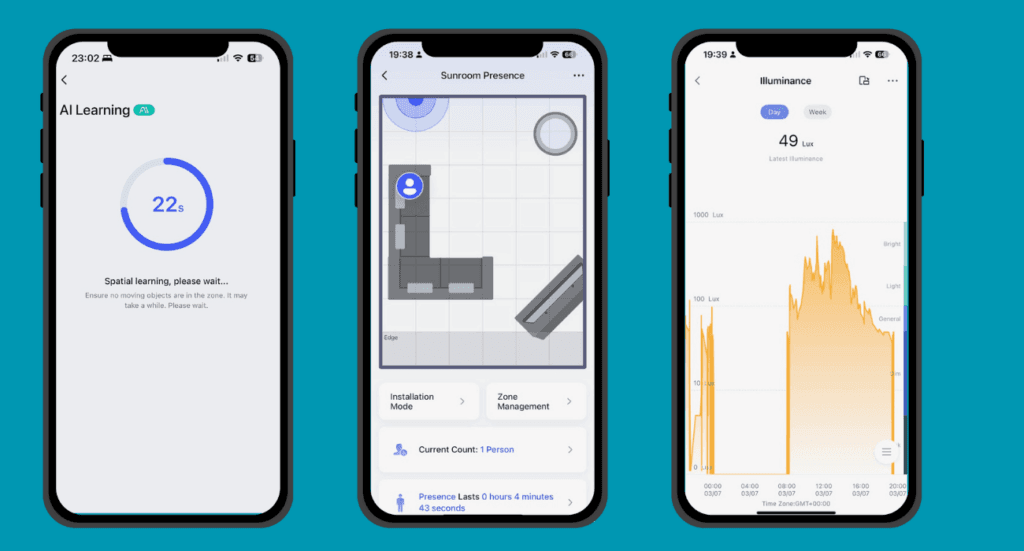
- Use Zone Positioning to map out rooms or activity areas. This is straightforward and includes an AI Learning stage.
- Adjust the FP2’s sensitivity and detection range as needed.
FP2 Placement Considerations
Placement is crucial, and a few factors should be considered:
- The sensor covers approximately 120 degrees, but dead zones exist on either side.
- The sensor cannot detect movement behind objects. For example, a plant placed next to the sensor significantly reduced the room’s mmWave coverage when moved just a few centimeters.
I repeated Step 2 a dozen times while adjusting the sensor’s placement and fine-tuning the room mapping. Editing zones after mapping proved challenging, so I found it easier to redo the process.
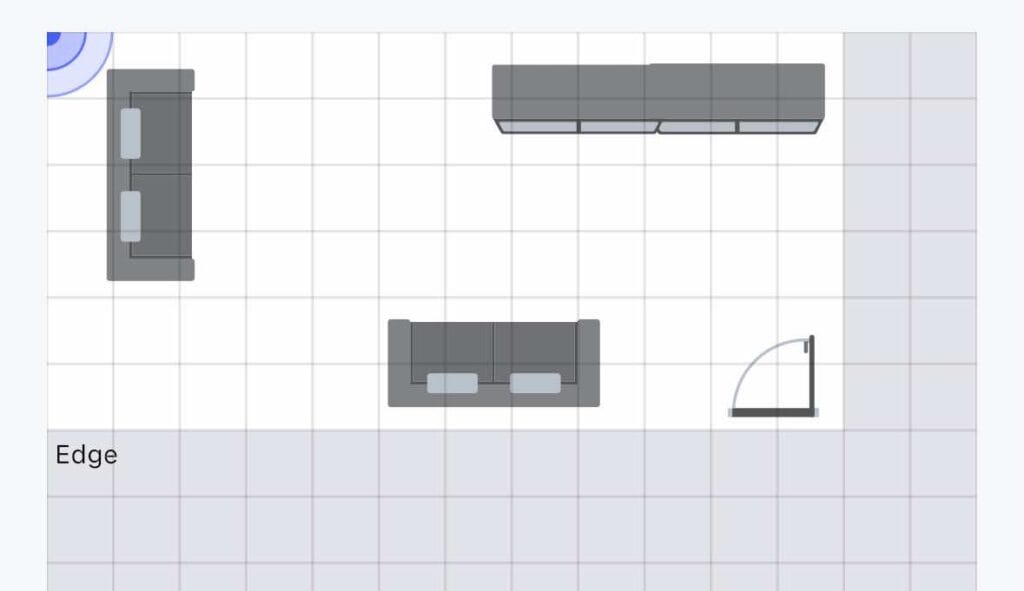
Adding Furniture to the Map
The Aqara app allows you to add ‘stickers’ representing furniture to the map. This requires some adjustment but greatly improves room mapping accuracy. I took a screenshot of my setup while sitting on my sofa, writing this article, and could see my precise location on the map. See the middle phone screenshot (above).
Aqara Presence Sensor FP2 Automations
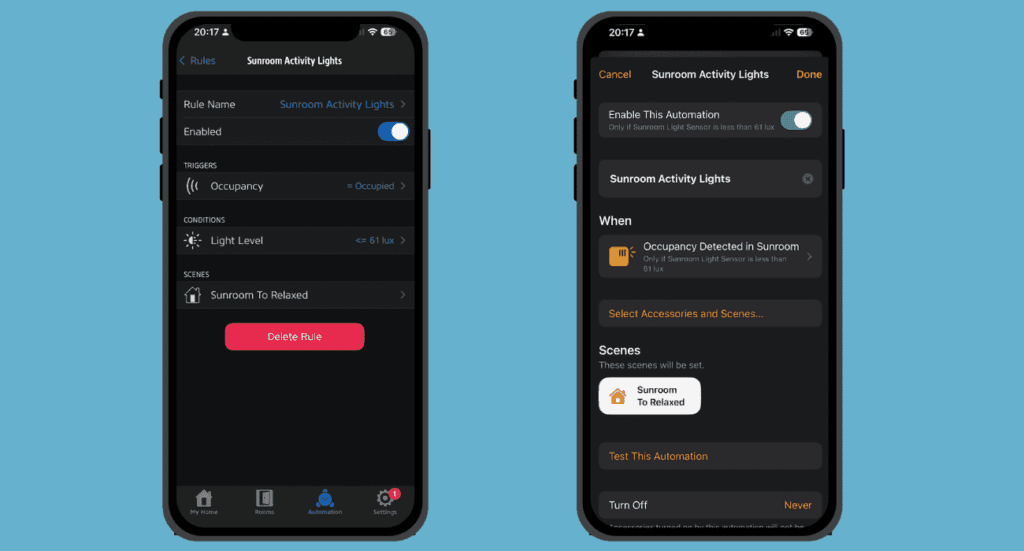
I manage my FP2 sensors using Apple HomeKit but use the Eve app to build more advanced automations. These automations are stored in iCloud within my HomeKit account.

My initial automation is simple: it triggers lights when presence is detected and the light level is below 55 lux. The lights turn off when no presence is detected..
Eve App for Easier HomeKit Automation
The Eve app is great for managing automations. Notably, when you delete an automation using Apple Home, it doesn’t disappear entirely it just becomes invisible.
The Eve app displays legacy automations and allows you to remove unwanted ones. Note you don’t need to own Eve devices to use the Eve app. Link: Eve App
Presence Sensors vs. Motion Sensors
A presence sensor can help save energy by only lighting a room when someone is inside.
Motion Sensor:
- Triggers lights when a person enters a room.
- Lights remain on for a set time before turning off.
- Users may need to wave their hands to keep lights on.
Presence Sensor:
- Lights remain on as long as someone is in the room.
- Lights turns off automatically when the room is vacant.
Use Case Comparison:
Example 1: A walkthrough area (e.g., a hallway)
A motion sensor is sufficient since presence tracking is unnecessary. i,e, the position in the room is irrelevant. Winner: Motion Sensor.
Example 2: A living room or office`
A presence sensor ensures lights remain on even when someone is sitting still. In fact different light combinations could be triggered depending on the position in the room. Winner: Presence Sensor.
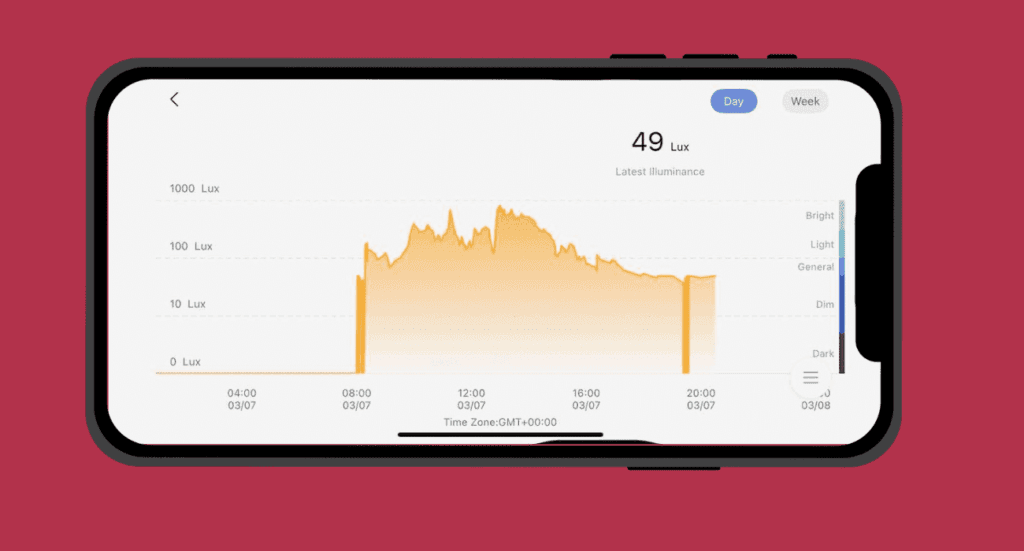
If You Love Data: The Aqara App
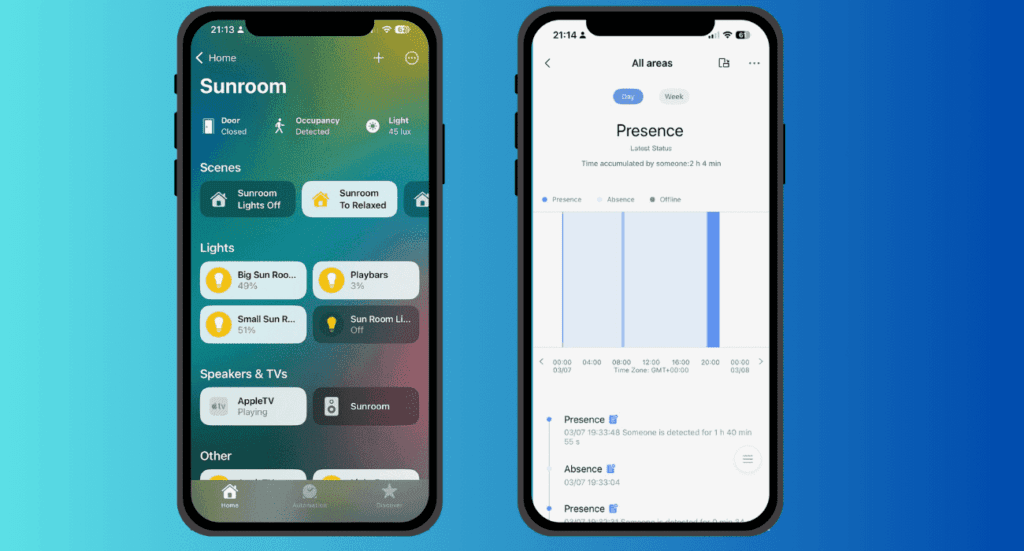
The Aqara app not only facilitates automation but also provides excellent data visualization. For example, the app logs room light levels throughout the day.
Aqara Presence Sensor Applications
Here are five ways a presence sensor can enhance a smart home:
- HVAC Automation: Adjust heating/cooling based on occupancy to save energy. Perfect alongside the Eve Thermo.
- Intruder Detection: Trigger security cameras or alarms when unexpected movement occurs. The Aqara M3 Hub has an alarm / speaker built in.
- Smart Lock Control: Unlock doors automatically when an authorized user approaches.
- Precise Location-Based Automation: Trigger automations based on specific locations in a room (e.g., turning on a computer monitor when sitting at a desk).
Conclusion
I have been using the Aqara Presence Sensor FP2 for over a week. I bought the first device for just under £60 on Amazon with a discount.
Initially, I was hesitant to invest in it over a cheaper motion sensor, but it’s clear this device operates on an entirely different level. My original goal was to fine-tune my lighting automation, but that now seems too basic for the FP2’s capabilities.
The Aqara’s pinpoint accuracy opens up a world of smart home automation possibilities. As result my second FP2 arrived yesterday with a similar, location specific application in another family room.
If you’re considering a presence sensor, I highly recommend the Aqara Presence Sensor FP2. It’s an impressive device, and if you enjoy tinkering with smart home technology, the FP2 will unlock a whole new realm of automation projects.
The next chapter is to really drilling down on accurate location based automation using Home Assistant or the Aqara App.
We are running two Aqara Presence Sensor FP2 devices and three sets of Aqara door and window sensors. The devices were ordered from Aqara UK or Amazon UK.
Links
Aqara Presence Sensor FP2 (Amazon)
Aqara M3 Hub (Amazon)
Getting Started with Apple HomeKit
Getting Started with Home Assistant